

Have you been searching for ways to improve your BBQ game using a Masterbuilt Electric Smoker? You’re in luck!
This guide will offer you helpful tips and tricks, ensuring you create the most mouth-watering dishes!
Welcome to this comprehensive guide to using a Masterbuilt electric smoker! Long used as an outdoor cooking device, the Masterbuilt electric smoker is gaining in popularity due to its very user-friendly interface and reliable performance.
This guide will explain how to use your new electric smoker. Many of the tips and tricks here are applicable to other brands of electric smokers as well, so don’t let the name fool you. We will cover everything from assembling it, through choosing the best cuts of meat for smoking, marinades, temperature control and clean-up. By the end of this guide you should be ready to smoke your first batch with confidence. So let’s dive in!
Brief overview of Masterbuilt Electric Smoker
Masterbuilt electric smokers are a popular, easy-to-use option for the smoking enthusiast. Unlike wood or charcoal smokers, electric smokers are fueled by electricity, which is far more consistent and easier to control than wood or charcoal. The precision allows you to catch that perfect flavor and texture every time. Better yet, electric smokers also come with a variety of features to make your life easier as a smoker.
By following some key tips and instructions for using your Masterbuilt electric smoker, you can become an expert in no time. This guide will provide tips on preparing your smoker and then instructions for use so you can set up the perfect smoking experience each time!
Importance of knowing how to use it
Knowing how to properly use a Masterbuilt Electric Smoker is important if you want to make delicious smoked recipes. The right tool can make the job easier, but it’s also important that you understand how to use it for the best results. Improperly using an electric smoker can lead to unevenly cooked or burnt food that isn’t as flavorful as it could be.
Masterbuilt Electric Smokers come with many customizable settings, including temperature controls and internal cooking temperatures. That’s why it’s important to take your time when setting up and using your smoker. Learn the tips and tricks of using an electric smoker so you can avoid common mistakes and get the most out of your new tool!
Getting Started
Now that yourMasterbuilt electric smoker is set up and ready to go, it’s time to learn about how to use it. First, make sure that the smoker is plugged into an electrical outlet with a grounded (three-prong) receptacle. You should also check the circuit breaker or fuse box to make sure you don’t overload the circuit you’re plugging it into.
Before you use your Masterbuilt electric smoker for the first time, clean it well inside and out. Take a damp rag or paper towel to wipe down the exterior and interior of your smoker. Consistently cleaning your smoker will not only help keep it in good condition but will help keep off any dirt or rust that could impact on the flavor of your food. It is also important that you periodically clean any greasy buildup in the burner area so there is no risk of a fire occurring while using it.
Next, be sure to fill up the woodchip tray with wood chips before lighting your smoker up – depending on what type of food you are smoking, different types of woodchips create different levels and types of smokey flavor profiles in order to infuse flavor with each smoked dish. Play around with various kinds of woodchips – like hickory chips for a more smoked pork dish, applewood chips for chicken or even mesquite for wild game birds -until you develope your own personal favorites!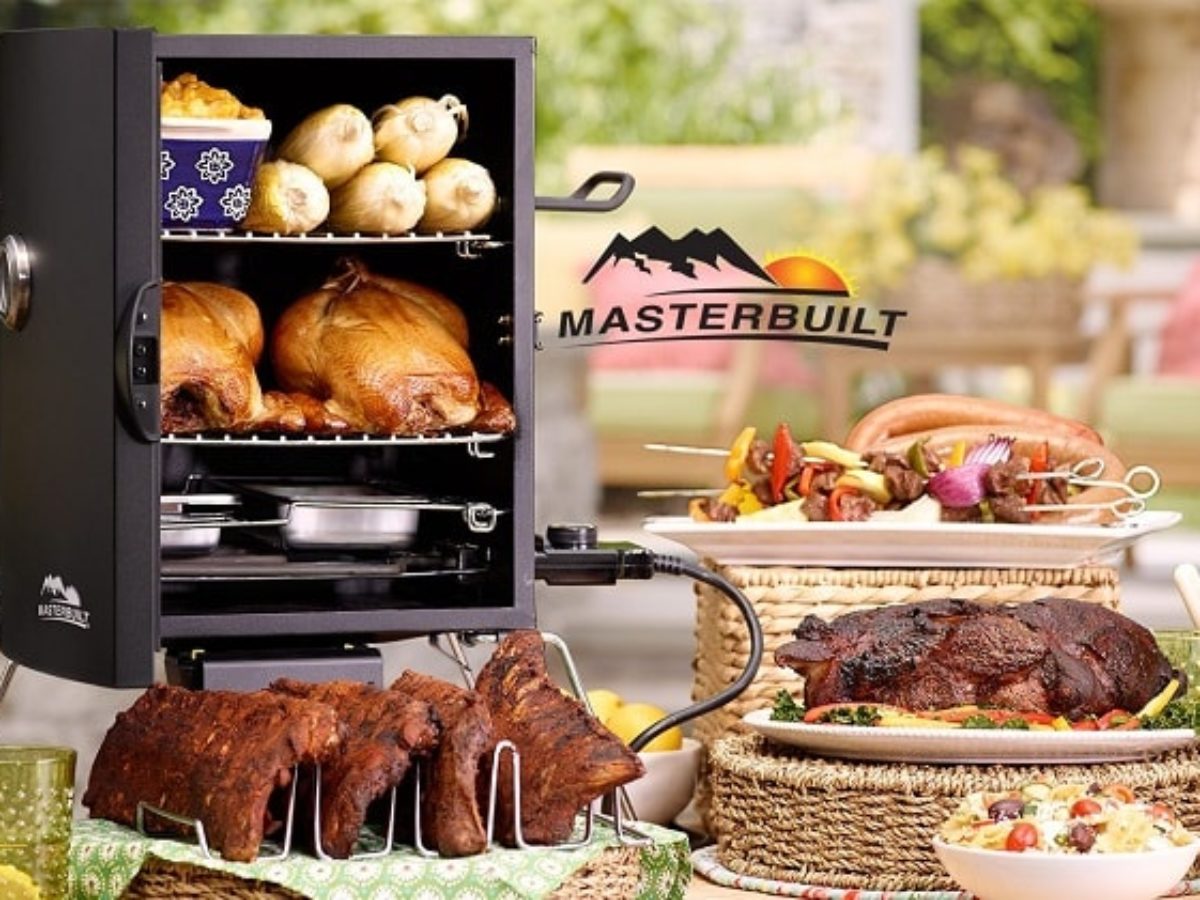
Assemble the smoker
Assembling your electric smoker is easy and straightforward and can be done in a few minutes. Gather all necessary items included with the smoker such as smoker legs, control panel, and cooking grates before you begin.
1) First, locate the base of the electric smoker and place it on a flat surface that is stable and not likely to become damaged from moisture or rust.
2) Take the side panels and stand them up around the base frame with the lip facing outward.
3) Lift up the control panel using both hands and fit it onto track until it locks into place.
4) Attach handles on each side of smoker by inserting two screws into predrilled holes then tighten by hand until snug.
5) The leg assembly consists of four (4) legs with four (4) screws to attach each leg to base of electric smoker. Note that certain models have an additional wheel (not pictured). Wheel attaches with one 1/2″ bolt at center bottom of right side panel, wheel should always point downward when in use as a safety precaution against tipping over while in use.
6) Place cooking grates into position across top portion inside of smoking chamber then secure heat baffles onto plastic mat located on backside inner walls on either side of smoke chamber; making sure that plastic mat has been removed before installation.
7) Lock down loading door securely using toggle clips located underneath top portion inside walls of smoking chamber or using key locking system for added security instead if available on your model; for safety reasons always ensure toggle clips are completely locked when doors are closed tightly shut at all times during use even when checking food or adding wood chips or water source such as ice cubes tray or cup depending on recipe used during each cook session.
Choose the right wood chips
When smoking food, it’s important to use the right kind of wood chips for optimal flavor. Different types of wood impart their own unique tastes and aromas to your food, so it’s important to make the right choice for your meal. Sweet woods like cherry, apple or alder are best used with poultry or pork; whereas bolder woods such as oak, mesquite or hickory are great for red meats such as beef and venison. You can also mix different types of wood chips to create unique flavor combinations.
When using pre-packaged wood chips, make sure they are 100 percent natural and that they don’t contain any additional additives or chemicals. Always soak your wood chips in water for at least an hour before using them, so they burn more slowly and evenly. If you choose to use chunks of wood instead of chips, be sure to break them into smaller pieces before adding them to the smoker box.
Preheat the smoker
Preheating is an important step before adding your food to the smoker. It takes time for a Masterbuilt electric smoker to reach a consistent cooking temperature and preheating allows it to get there faster. Make sure to preheat your smoker so that any moisture has time to evaporate before adding the food, preventing flare-ups.
The amount of time that you need to preheat a Masterbuilt electric smoker will depend on the type of food you’re going to cook, as well as how much smoke flavor you’d like it to have. For lighter foods like vegetables and fish, a five minute preheat should do the trick. If you’re smoking heavier cuts like pork or beef, however, then you should preheat for at least 15 minutes or longer depending on the size of the cut of meat.
It’s important not to overload your smoker when preheating it—using too much wood can result in more smoke than necessary and can lead to uneven cooking temperatures in different parts of the smoker. Start with just one or two small chunks of wood chips when first getting started and increase as needed based on how hot you want your fire.
Preheating is a major part of using an electric smoker correctly and is an important step that should not be overlooked. By following these tips and tricks on how to correctly use your Masterbuilt electric smoker with success, you’ll be serving up delicious smoked dishes in no time!
Season the smoker
The Masterbuilt electric smoker is easy to use and a great way to infuse smoky flavor into food. To get the most out of your smoker, be sure to season it before use. Seasoning the smoker helps maintain its surfaces and will also give your cooked food added flavor.
Seasoning your electric smoker is simple, and involves heating the smoker for a few hours with nothing inside. Heating up the smoker will activate its seasoning process, which involves creating a protective layer that seals in moisture and locks in flavor. This process should be done every few months or each time you buy a new Masterbuilt electric smoker. To season your Masterbuilt electric smoker:
- Prepare the wood chips: If you plan to use wood chips while smoking, make sure they are soaked ahead of time.
- Plug in the smoker: Plug in your Masterbuilt electric smoker according to its designated instructions, either outdoors or in a well-ventilated area like a garage or porch. Make sure all vents are open for proper ventilation during seasoning.
- Heat it up: Set the temperature of the set dial knob on “Smoke” and adjust until smoke appears from outside vents for about three minutes — this indicates that it has reached proper smoking temperature (approximately 250°F). Once smoke no longer appears from vents, you can begin seasoning by leaving empty for two hours at 250°F heat setting, then turn off heat setting switch when finished seasoning.
Smoking Techniques
Smoking techniques have a significant effect on the flavor of your smoked food. There are several distinct smoking techniques you can use with your electric smoker to create delicious, succulent, tender and flavorful cuts of meat.
Hot Smoking: Hot smoking is the most common smoking technique used by Masterbuilt electric smokers. This process uses direct heat from the side at high temperatures to cook the food while imparting a smoky flavor. With this technique, it’s important to keep an eye on the temperature since it’s easy to overcook your food during hot smoking.
Cold Smoking: Cold Smoking works best with fatty fish and cheese products as it allows them to absorb more smoke flavor, while still remaining dry and evenly cooked throughout. This process uses indirect heat from lower temperatures than hot smoking. Cold smoked foods are typically cooked ahead of time and then placed in a smoker for flavor only (and not actually cooking); however, some foods may require extra cooking in an oven or stove-top before they’re ready for cold smoking in an electric smoker.
Using Wood Chips: Wood chips are one of the most commonly used fuels for Masterbuilt electric smokers. You can purchase pre-soaked wood chips from Masterbuilt or soak them yourself before use (15 minutes is generally sufficient). Keep in mind that different types of wood impart different flavors, such as hickory, cherry or oak; experiment with various types of wood chips until you find what tastes best to you. Wetting your chips also helps keep them smoldering longer so that you don’t have to constantly re-apply them during longer sessions of hot or cold smoking.
Basic smoking techniques
- Basic Smoking Techniques: Smoking with an electric smoker is a great way to give your food unique flavor by adding wood chips or chunks. Depending on the type of wood chips you choose and the amount of time your food spends in the smoker, different combinations make for incredibly delicious dishes. Here are a few basic tips and techniques to help you get started:
- Choose Your Fuel: Wood chips or chunks are best for smoking, as they are easy to start and provide good, consistent smoke. Use chunks if you’re planning on a longer cooking time and be sure that your fuel doesn’t contain any accelerants like charcoal lighter fluid or starter cubes, as these can add unwanted flavors.
- Preheat Your Smoker: Your electric smoker should be preheated before adding any fuel, so that it is running at its peak efficiency when you begin smoking. Pre-heat your Electric Smoker between 200 – 225° F (93 – 107° C). This will help ensure consistent temperature throughout your entire smoking session.
- Use Separate Pans for Chips and Food: Use separate pans for any fuel you place in the Electric Smoker chamber, as it may cause flare-ups if placed directly onto food. For even cooking, use foil trays inside the smoker when placing meat or fish on racks in order to keep them away from direct heat sources from fuel pan area where smoke comes from. Doing so will also help maintain moisture in cooked foods throughout their time in the chamber. Additionally, this allows you to easily discard any drippings after smoking has finished. Keep all pans at least 6 inches from walls of electric smoker.
- Monitor Your Temperature: Masterbuilt makes models with temperature probes that allow you to remotely monitor the temperature inside your Electric Smoker throughout its cycle for perfect results every time. Make sure to always monitor your temperatures by using a separate thermometer placed close to where food will be smoked, and adjust accordingly if needed during cooking process. The internal temperature should remain within 20 – 25° F (11 – 14° C) of target temperature at all times while smoking.
Different types of smoking
Cooking with an electric smoker can produce amazing flavor and texture, but getting the results you’re looking for out of this style of cooking requires an understanding of the different types of smoking techniques. Before you start smoking your favorite cuts of meat, it’s important to understand the differences between hot smoking, cold smoking, and smoke roasting.
Hot Smoking Hot smoking refers to using steam, smoke or hot air in combination with heat to cook the food at temperatures typically ranging from 200-285°F. The advantage of hot smoking is that it cooks your food quickly and makes it tender and flavorful. This method is generally used for fish, nuts, cheese and sausages but can also be used on larger cuts like poultry thighs or beef ribs.
Cold Smoking Cold smoking refers to cooking food at temperatures below 100°F by using cold wood smoke as a flavor enhancer rather than a heat source. Meat cooked in this manner usually has a lightly smoked flavor which meets USDA safety guidelines yet still retains its natural taste and texture. The amount smoked flavor depends on both time and temperature so it can vary from one item to the next. Cold Smoking is typically used on fish, cheese and other dairy products but can also be used for meats including beef brisket, pork chops or ribs.
Smoke Roasting Smoke roasting refers to combining hot-smoking with temperature controlled roasting in order create unique flavors with minimal effort. This type of cooking involves using very low heat (temperatures ranging 90–200°F) while introducing smoldering wood chips inside the chamber around meat product as they cook slowly over time. This proven method produces moist, juicy tenderness while locking in all the essential flavors without sacrificing texture.. Smoke Roasting is often used on fatty cuts such as duck breasts or pork shoulder, however it’s also ideal for leaner meats like turkey or even vegetables like potatoes or cauliflower.
Conclusion
A Masterbuilt electric smoker makes the perfect tool for any barbecue cook. It offers precise temperature control, an easy-to-use setup and delivers consistent results every time. With a bit of practice and some handy tips, anyone can master the art of making great barbecued food with a Masterbuilt electric smoker.
Using the tips from this guide, you will quickly understand how to work your way around your electric smoker. From knowing how to season and prepare your food to being able to set the perfect temperature for cooking, you now have all the information you need to become an expert in barbecue smoking.
The secret is out; using a Masterbuilt electric smoker is easy! With its many functions and limitless possibilities you can enjoy great flavors right in your own backyard. So what are you waiting for? Get ready to become an ace at barbecuing with your new Masterbuilt electric smoker – happy smoking!
FAQS
How do you get good smoke with Masterbuilt?
To get good smoke with Masterbuilt, make sure to use the correct type of wood chips, keep the smoker at the recommended temperature range, and maintain proper ventilation for airflow.
How do I get the best results from an electric smoker?
To get the best results from an electric smoker, ensure that the temperature is accurate and consistent, use quality wood chips, and follow the recipe instructions carefully.
How do I use my Masterbuilt electric smoker?
To use your Masterbuilt electric smoker, first, plug it in and set the temperature. Then add the wood chips, place the food on the racks, and let it smoke for the recommended time.
How often do you need to add chips to a Masterbuilt electric smoker?
The frequency of adding wood chips to a Masterbuilt electric smoker depends on the desired level of smoke and the type of wood chips used. Generally, it is recommended to add chips every 30 minutes to an hour.
Do you put water in Masterbuilt smoker?
Yes, it is recommended to add water to the water pan of a Masterbuilt smoker to help regulate the temperature and keep the food moist.
Should I preheat my electric smoker?
Yes, preheating your electric smoker before adding the food is recommended to ensure consistent temperature throughout the cooking process.
How do I get my smoker to produce more smoke?
To get your smoker to produce more smoke, you can add more wood chips, increase the airflow, or use a smoke generator accessory.
Should I clean my electric smoker after each use?
Yes, it is recommended to clean your electric smoker after each use to prevent any buildup of grease or residue that can affect the flavor of the food.
How do you use a smoker for beginners?
For beginners, start by choosing an easy recipe, selecting the appropriate type of wood chips, and keeping the temperature consistent throughout the cooking process.
How do you use a beginner electric smoker?
To use a beginner electric smoker, read the user manual carefully, ensure that all components are properly assembled, and start with a simple recipe. Additionally, monitor the temperature closely and adjust as necessary.
See Also:
- Best Electric Smoker For Cold Weather
- Best Electric Smoker For Fish
- Best electric smoker under $400
- Best Electric Smoker Under 200
- Best Electric Smoker Under 300